Fulfillment Center Lighting: Master High-Density Storage
By Chidi Okoye • 4th Apr
Fulfillment center lighting represents one of the most technically demanding illumination environments photographers and videographers encounter. Unlike traditional warehouses, fulfillment centers demand dense shelving, rapid picking, frequent scanning, and automated systems, all generating distinct color and intensity challenges for anyone documenting these operations or shooting products within them. This guide unpacks the spectral and operational realities of high-density storage illumination and translates them into actionable workflows for content creators.
What Makes Fulfillment Center Lighting Different from Warehouse Lighting?
Fulfillment centers are not warehouses. Warehouses typically maintain 10-30 foot-candles for general storage and passive retrieval.[2] By contrast, fulfillment centers target 40-60+ foot-candles in picking and packing zones, with inspection areas reaching 50-75 foot-candles depending on task complexity.[1] This difference is not merely intensity; it reflects operational philosophy.
Warehouses store bulk items with infrequent access. Fulfillment centers process thousands of small orders daily, requiring rapid bin location, label scanning, and quality checks. That velocity demands higher and more uniform light distribution, especially vertical illuminance on shelving and bins.[1] For a photographer or videographer working in these environments (whether documenting automated systems, shooting B-roll of conveyor belt operations, or capturing product close-ups on fulfillment floors) this uniformity is both a gift and a constraint.
The gift: consistent baseline lighting across the space means fewer surprise shadows. The constraint: uniformity often comes from multiple overlapping fixtures, creating complex mixed spectral power distributions (SPDs) that can shift product hue and skin tone unpredictably.
What Color Temperature and Light Quality Should You Expect?
Fulfillment centers typically specify 4000K-5000K color temperature for visibility and alertness.[1][3] This cool white range sits at the boundary between neutral and blue-shifted perception, optimal for rapid visual scanning but notoriously challenging for accurate skin rendering and product color. When selecting fixtures to supplement ambient, consider high-CRI hybrid panels that preserve skin tones and product color under camera.
The problem is not temperature alone; it is spectral shape. Most fulfillment lighting uses LED arrays optimized for efficacy (lumens per watt) and inventory visibility rather than color fidelity. A 5000K LED with a weak red channel and a spike in the green-yellow region will render skin as pale and product reds as muted, even if the correlated color temperature reads correct on a meter.
This mirrors a challenge I encountered in a boutique with mixed LED sources: the hero dress appeared gray on camera while shoppers saw emerald. A spectral analysis revealed a gap near 620 nm (the LED array lacked energy in deep red, causing the saturated fabric to desaturate under camera white balance). Swapping to a light source with a fuller SPD and building a camera-specific profile restored color fidelity. The same principle applies to fulfillment environments: skin tones first; product accuracy follows when spectral coverage is continuous across visible wavelengths.
How Do You Manage Mixed SPDs and Maintain Consistent White Balance?
Fulfillment center lighting is almost never monolithic. Picking zones may use one fixture type, packing areas another, and ambient fill from skylights or ancillary sources creates a composite SPD. This layering is the core challenge.
Approach white balance in two stages:
Stage 1: Meter the dominant source. Use a color temperature meter or a gray card under the primary picking light. Record the CCT and any noted color cast (green, magenta, blue tint). This becomes your reference, the baseline for all subsequent shots in that zone.
Stage 2: Identify secondary sources and their impact. If a camera's auto white balance is drifting between shots, a secondary source (window light, emergency exit signage, auxiliary LED strips) is likely contaminating the scene. Flag or exclude that source if possible, or gel/filter it to match the primary. If exclusion is not feasible, meter the secondary and calculate a blended CCT using weighted averages. To choose the right control light for taming mixed sources, see our continuous vs strobe guide.
For video: Lock white balance to the metered value in Kelvin (do not use auto). For stills across multiple locations in the same facility: shoot a reference gray card under each fixture type and note its position and SPD. Later, use those cards to build custom white balance profiles in your RAW processor, ensuring color consistency across cuts and locations.
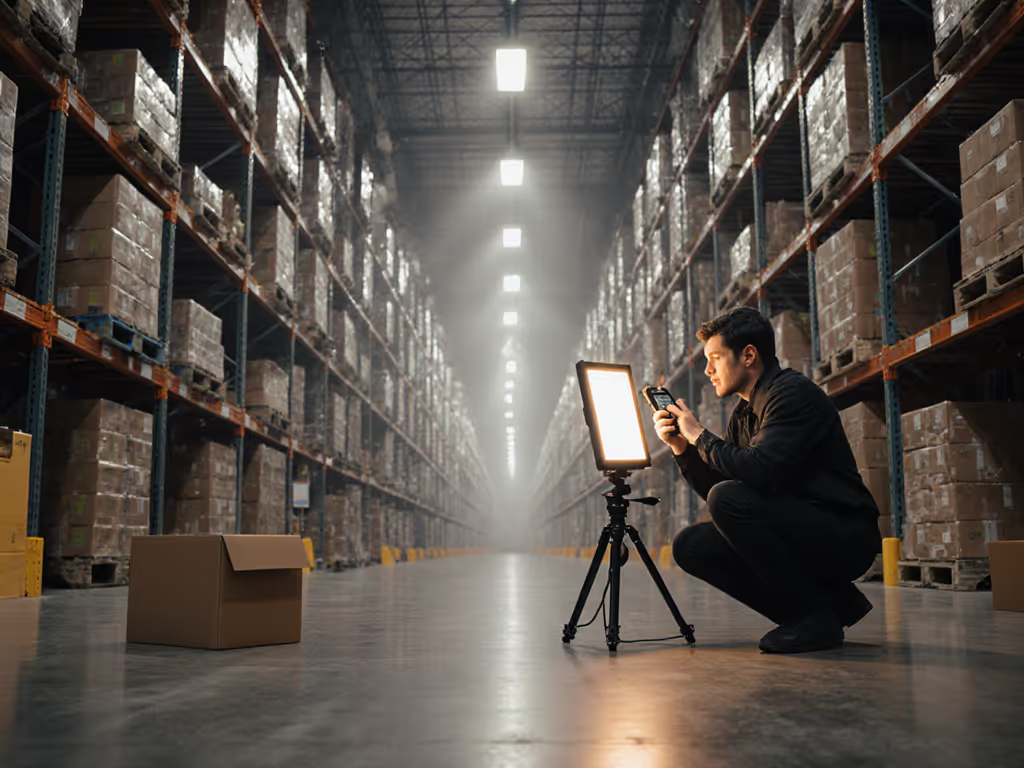
What Are the Challenges of High-Density Shelving for Video and Photo?
Vertical illuminance is fulfillment's hidden demand.[1] High-bay and UFO-style fixtures are optimized for horizontal uniformity on the floor but often cast uneven light on racked products and shelving faces. For a videographer shooting conveyor belt operations or an automated inventory system, this means:
Shadows and banding on vertical surfaces. Bins on upper shelves may receive adequate light, while lower bins sit in shadow. Harsh transitions create an unprofessional, fragmented visual. To mitigate: position your camera angle to minimize the shelving directly behind talent or key products. Use negative fill (dark flags or fabric) to block stray light that might create hot spots on reflective surfaces. If shooting talent (warehouse staff, quality inspectors) in these zones, bring a small key light (compact LED panel) to fill the shadows and ensure skin tone consistency.
Beam angle mismatches. Fulfillment fixtures typically use 120° beam angles to maximize floor coverage.[1] This wide distribution works poorly for precise product shots or close-ups. A 120° beam at 20+ feet ceiling height spreads the light over a large area, reducing intensity at product level and increasing the ratio of ambient to key light. Result: flat, desaturated color. Solution: use a small LED panel or focus light (even a phone-sized RGB LED) to add a controlled key light to the product, and meter its output relative to ambient to maintain a 2:1 or 3:1 key-to-fill ratio. For tighter spill control in narrow aisles, compare softbox shapes to shape light precisely on products.
How Do You Photograph Automated Systems Under Fulfillment Lighting?
Robotic system lighting and conveyor belt photography introduce a second layer of complexity: motion and reflectance.
Motion considerations: Conveyors and automated arms move continuously. Long exposures or slow shutter speeds cause motion blur, but fast shutter speeds (1/500 or faster) require higher ISO or wider apertures, both of which introduce noise or shallow focus. Fulfillment lighting's high baseline (40-60+ fc) supports faster shutter speeds without pushing ISO. Advantage: cleaner video frame rates (24/30 fps) at standard shutter angles (180° rule).
Reflectance and specular control: Automated systems often feature polished stainless steel, painted rollers, and glossy packages. These surfaces bounce fulfillment light unevenly, creating harsh hot spots and losing detail in highlights. Polarizing filters can reduce specular reflection by 30-50%, but they also cut overall light transmission by 1-2 stops. Alternatively: position your camera angle to catch light at a shallow incidence, reducing direct reflectance. Add a small flag or diffusion frame near the subject to soften the primary light and avoid over-specular zones. For step-by-step glare management, study controlling specular highlights in product photography.
Can You Replicate Fulfillment Center Lighting in Smaller Spaces?
For freelancers and in-house marketers shooting product or talent in spaces without access to actual fulfillment environments, fulfillment characteristics are reproducible:
Target 40-50 foot-candles using compact LED panels. If you need an affordable starter setup, check these accurate color kits under $500. A 1×1 ft LED panel at 5000K, positioned 4-5 feet from the subject, delivers roughly 40 fc on an 18% gray card. Bounce or diffuse to reduce harshness and even intensity across shelving or racked products.
Build a three-light setup mimicking high-bay distribution. Use a main key light (high-intensity LED at 4000K-5000K), an ambient fill (diffused LED or bounce from a large white surface), and a back or edge light to separate subjects from shelving. This replicates the layered SPD complexity of actual fulfillment spaces and trains your eye for color and tone consistency.
Meter for uniformity, not just intensity. Fulfillment lighting values uniformity across the scene. Use an incident meter or a spot meter on a gray card to measure light at multiple points (foreground, mid-ground, background). Aim for a ratio no worse than 3:1 between brightest and dimmest areas. Non-uniform lighting introduces color shifts (shadows appear warmer or greener due to lateral SPD mixing) and reduces perceived professionalism.
What Post-Processing Approach Minimizes Grading Work?
The fulfillment environment's consistent baseline lighting allows for efficient RAW workflows with minimal correction. Skin tones first: if your white balance reference and camera profile are solid, skin should render neutral or warm without aggressive adjustment. Product colors follow: reds, blues, and saturates should track predictably once your color matrix is calibrated.
Build a LUT (lookup table) or develop preset for each fulfillment zone you shoot regularly. Use the gray card reference under that zone's primary light to define a custom white balance in your RAW software, then apply a gentle lift to shadows (avoiding green cast) and a slight compression to highlights (preserving detail on glossy subjects). This preset becomes your foundation for 80% of cuts from that location. Reserve selective color grading for anomalies (secondary light contamination, reflections) rather than global correction.
Key Takeaways for Shooting in High-Density Storage
Fulfillment centers operate at 40-60+ foot-candles with 4000K-5000K LEDs, generating high-uniformity but spectrally complex light. Success depends on three practices:
First, meter your environment. Record white point, SPD complexity, and any secondary sources. This baseline is your north star for all subsequent work in that space.
Second, prioritize skin tone and product fidelity in camera. Use custom white balance, build camera profiles from gray card references, and avoid over-reliance on post grading. Clean output is faster and more consistent.
Third, control reflections and transitions. Use flags, diffusion, and strategic camera angles to manage specular highlights on glossy surfaces and minimize banding on vertical racked products. Fulfillment lighting is intense and uniform, harness that for consistency, but do not let harsh transitions undermine the professional look.
Fulfillment center environments demand respect for their spectral character and operational constraints. When you understand the lighting (its intensity, color temperature, and spatial distribution) you transform a chaotic mixed-source problem into a reproducible, controllable foundation. The rest, as always, orbits around skin tones first.
Related Articles