Portrait Lighting Psychology: Design Emotional Response
By Aisha López • 3rd Mar
Lighting portrait work is rarely about gear alone. It's about engineering the emotional response you want your viewer to have the moment they see a face. Yet most creators treat lighting as either a technical problem ("get the exposure right") or an aesthetic gamble ("try this famous setup"). Neither approach accounts for the fact that psychological lighting effects operate on a deeper, measurable level, one where every watt has a job, and every shadow tells the viewer how to feel.
The gap between what you light and how it lands emotionally in your viewer's brain is where results live or die. This article breaks down the science, cuts through the noise, and gives you a decision framework to design lighting setups that hit the emotional target every time.
The Problem: Lighting as an Emotional Language You May Not Be Speaking Fluently
Most portrait photographers and video creators understand that light shapes the face. Fewer understand that light shapes the mind receiving that image.
Light and shadow play a crucial role in creating mood in portrait photography, they can evoke a range of emotions, from joy and hope to sadness and mystery.[1] A portrait lit with soft, warm light can convey comfort and intimacy; a portrait with harsh, cold light and deep shadows can create tension or unease.[1] But here's the catch: the psychology of lighting isn't just aesthetic preference. It's measurable, predictable, and trainable.
When light biologically impacts a viewer, it can improve mood, decrease depression scores, and even increase cognitive performance such as reaction time.[4] Brightness itself intensifies emotional responses, while low light keeps emotions steady, which means brighter light doesn't just show detail; it amplifies the emotional payload of whatever you're lighting.[4]
Yet in small, real-world spaces (apartments, offices, hotel rooms), you're not working with a blank canvas. You're fighting mixed color temperatures, power constraints, and the physics of small ceilings and tight walls. Understanding the why behind lighting psychology becomes your constraint-solver. It separates reliable pros from guesswork shooters. If you're refining core light direction skills, start with our lighting angles guide.
The Agitation: Why Emotional Lighting Fails in Practice
The disconnect between theory and practice lives in three places.
First: Color confusion and skin tone sabotage.
Different colors of light have a significant effect on mood, and this effect compounds when aimed at human skin.[2] Red light, for example, reduces feelings of calm, relaxation, stability, and pleasure, while elevating irritation and nervousness.[2] Blue light reduces feelings of relaxation and stability and increases irritated feelings.[2] Green light reduces the feeling of pleasure, and yellow light reduces irritated feelings.[2]
Translate that to a portrait shoot: a single LED fixture with a poor color rendering index (CRI) or a daylight window contaminating your key light doesn't just create a white balance problem. It biologically shifts how your viewer feels about the subject's face. Skin looks sickly, untrustworthy, or exhausted. A freelancer shoots a personal brand portrait with cheap tungsten-tinted room light + daylight from a window and wonders why the image feels "off." It's not off aesthetically, it's off neurologically. For inclusive, accurate results across complexions, see our lighting for diverse skin tones guide.
Second: Lighting ratios without purpose.
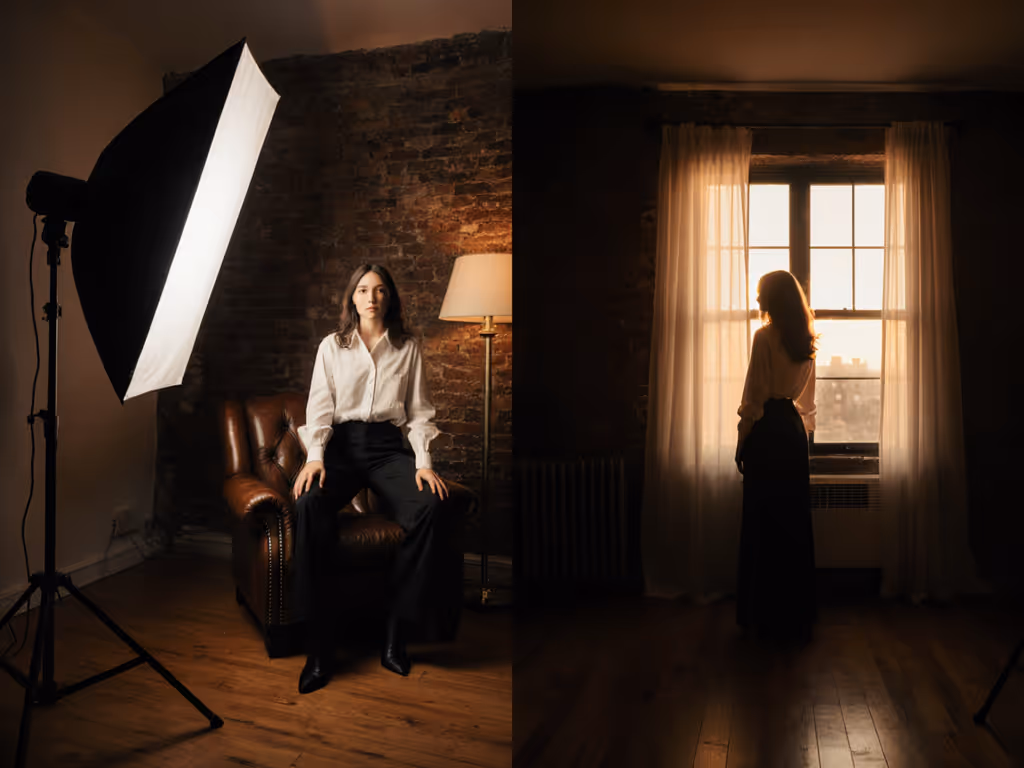
Bright, even lighting often conveys clarity and friendliness, making it perfect if you want to appear approachable and trustworthy.[3] A more dramatic, high-contrast look can project depth or sophistication.[3] Hard light (coming from a small, direct source) creates sharp, well-defined shadows and a more dramatic feel, useful for edgy, high-impact images.[3] Soft light tends to flatter every face by reducing harsh lines and gently wrapping around the features, and is brilliant for relaxed personal headshots and brand imagery.[3] For a practical, cross-genre comparison, read our soft vs hard light guide.
But knowing this isn't the same as deploying it. Most creators reach for either a single soft source or a standard "fill and key" setup without asking: What emotion am I trying to trigger? And in a 9-foot-ceiling bedroom with shared outlets, the lighting ratio you want may not fit the power budget or space you have. Smart constraints beat big carts. For proven patterns and ratios by face shape, explore our portrait lighting setups comparison. The solution isn't more lights, it's lighting designed around the outcome you need and the space you actually have.
Third: Recreatability collapse.
You nail a look on Monday. You move locations on Wednesday. The lighting feels different. You spend three hours tweaking, shooting, and grading, trying to match what you had. You never recorded the distance, the power level, the modifier size, or the white balance target. Emotional lighting becomes a roll-of-the-dice instead of a system. In a gig-based world where you move between co-working spaces, retail floors, and short rentals, this is fatal to your brand consistency and your hourly rate.
The Solution: A Modular Lighting Psychology Framework
Emotional lighting design in small spaces requires a systematic approach: isolate the emotion you want, map it to lighting properties, then build a portable kit recipe that works anywhere.
Step 1: Define the Emotional Target
Before you plug in a single light, answer this:
- Approachable, trustworthy, open? You need bright, even, soft lighting. Think corporate headshots, personal brand portraits, product lifestyle shots.
- Authoritative, focused, confident? A higher-contrast lighting ratio with a moderately hard key light. Think leadership portraits, thought-leader video.
- Dramatic, mysterious, edgy? Deep shadows, sharp shadows, selective lighting on the face. Think artist portfolios, moody narrative work, cinematic stills.
- Calm, grounded, reflective? Warm color temperature, soft fill, low-to-moderate contrast. Think wellness brands, intimate interviews.
This choice dictates every downstream decision: modifier size, distance, color temperature, and power level.
Step 2: Translate Emotion to Lighting Ratios and Color
Once you've chosen your emotional direction, map it to specific, measurable lighting properties:
For approachable/trustworthy lighting:
- Main light: Soft source (umbrella, small octabank, or bounce), 3:1 to 4:1 ratio (key to fill).
- Color temperature: 5000-5600 K (neutral to slightly warm), CRI 95+. Avoid blue-shifted or green-tinted LEDs.
- Distance: Key light ~4-5 ft from subject, fill at similar distance or from opposite side.
- Power level: 150-250W equivalent (soft modifiers spill; you don't need maximum output).
- Result: Open, readable, trustworthy face. Viewers feel safe and engaged.
For authoritative/confident lighting:
- Main light: Moderately hard source (5"-7" softbox, small beauty dish with grid, or reflector + diffusion), 5:1 to 8:1 ratio.
- Color temperature: 5000-5400 K (neutral). Slight cool tint is acceptable.
- Distance: Key light ~3-4 ft, positioned 45° above and to the side. Minimal fill (only catch light in eyes).
- Power level: 250-400W equivalent. Hard modifiers throw farther; you can afford to stay farther away.
- Result: Sculpted face, defined cheekbones, controlled shadows. Viewers perceive authority and focus.
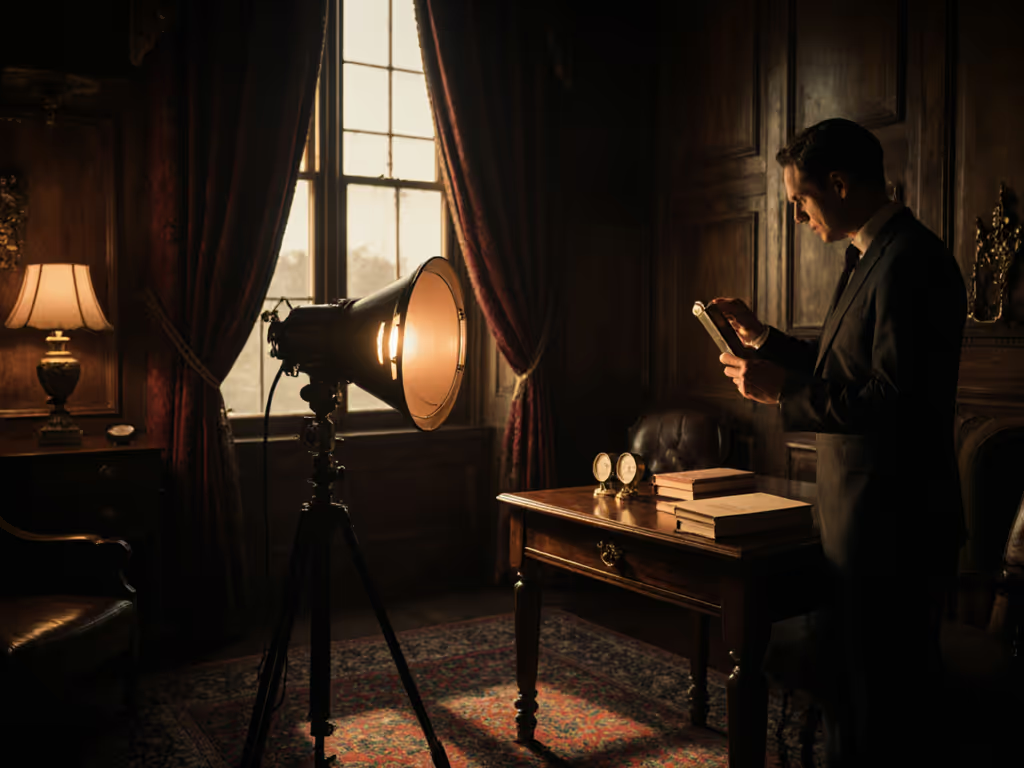
For dramatic/mysterious lighting:
- Main light: Hard source (small Fresnel, beauty dish without diffusion, or bare reflector), 10:1 to 20:1+ ratio.
- Color temperature: 5000-5400 K or tungsten-tinted (3200 K) for intentional warmth/mystery.
- Distance: Key light ~2-4 ft, positioned dramatically (70°+ angle, low angle for menace, high for mystery).
- Power level: 200-500W equivalent depending on distance and falloff desired. Hard modifiers give you maximum control over spill in tight spaces.
- Result: Deep shadows, selective illumination, heightened emotion. Viewers feel intrigue or tension.
For calm/grounded lighting:
- Main light: Very soft source (large umbrella, reflector, or diffused window as secondary fill source), 2:1 to 3:1 ratio.
- Color temperature: 5000-5600 K with a hint of warmth (5200 K is ideal). Red and yellow light reduce irritated feelings.[2]
- Distance: Key light ~5-6 ft for wrap-around softness. Generous fill from opposite side or bounce.
- Power level: 100-150W equivalent. Soft modifiers diffuse energy; you're aiming for overall luminosity, not punch.
- Result: Enveloping light, minimal shadows, warm mood. Viewers feel safe, peaceful, introspective.
Step 3: Build a Portable Modular Kit Recipe
The constraint of small, real-world spaces is actually a gift. You don't need a full lighting truck. You need a decision tree and a compact kit that covers 80% of jobs.
Core modular kit for approachable/trustworthy:
- 1× LED continuous light, dimmable, 200-300W equivalent, 5600 K, CRI 95+. Quiet (under 30 dB), cool-running.
- 1× 32"-40" white umbrella or collapsible octabank.
- 1× white V-flat or 4'×8' foam board (bounce/fill).
- 1× light stand or boom arm (critical for small spaces).
- Power requirement: ~40-60W. Fits a standard outlet with headroom.
Modular upgrade path for higher contrast (authoritative):
- Same LED light, but add a 5"-7" softbox with removable diffusion (lets you harden the light without replacing fixtures).
- 1× white/silver reflector panel (collapsible, 5-in-1 type, ~2 lb).
- Same power footprint; you're just changing modifiers, not multiplying lights.
Modular dramatic setup (small space version):
- Same LED light, but reposition closer and remove diffusion or add a grid.
- Add 1× small black flag or negative fill (foam board with black tape) to control spill and deepen shadows in tight spaces.
- Power: still ~40-60W. The drama comes from placement and ratio, not raw power.
Color temperature safety net:
- Carry one small tungsten-corrected LED (3200 K, ~50W equivalent) as a backup for mixed-ambient shoots or intentional warm moods.
- Total kit power: ~90-110W. One standard outlet. No breaker risk. No assistant needed.
This is the kind of constraint-led recipe I rebuilt when a two-city e-commerce sprint's rental quote ballooned and the location's breaker panel was ancient. Three lights, two batteries, one collapsible modifier set, cross-brand, quiet, and it matched the look, cut noise, and finished under budget with a single outlet to spare. Every watt has a job; none was wasted on hype or bulk.
Step 4: Document Your Setup for Reproducibility
Once you've dialed in a look that hits your emotional target, record:
- Distance from key light to subject (e.g., "4.5 ft").
- Key light power level, color temperature, and CRI (e.g., "70% brightness, 5600 K, CRI 98").
- Modifier type and size (e.g., "32-inch umbrella, diffusion on").
- Fill source and distance (e.g., "white V-flat, 6 ft opposite, angled 45°").
- Subject distance from background (controls shadow throw).
- Ambient light (if any, and whether it's being used or gelled/suppressed).
- White balance target in your camera (5600 K, daylight, or custom Kelvin value).
- Exposure setting (ISO, aperture, shutter speed) and meter reading (in lux or foot-candles if you measured).
A single photo or 2-3 sentence note is not enough. A repeatable setup requires numbers. When you land in the next location, you have a recipe, not a prayer.
Comparative Quick Reference: Lighting Emotion in Tight Spaces
| Emotional Target | Key Modifier | Ratio | Color Temp | Distance | Power | Space Fit | Skin Read |
|---|---|---|---|---|---|---|---|
| Approachable | Soft (umbrella, octabank) | 3:1-4:1 | 5000-5600 K | 4-5 ft | 150-250W | 9-ft ceiling OK | Warm, open, readable |
| Authoritative | Moderate (small softbox + grid) | 5:1-8:1 | 5000-5400 K | 3-4 ft | 250-400W | Tight ceilings work; needs side space | Sculpted, focused, confident |
| Dramatic | Hard (grid, bare reflector) | 10:1-20:1+ | 5000-5400 K or 3200 K | 2-4 ft | 200-500W | Very tight spaces best (high contrast, small light) | Shadowed, intense, mysterious |
| Calm, Grounded | Very soft (large bounce, umbrella) | 2:1-3:1 | 5200-5400 K | 5-6 ft | 100-150W | Spacious (soft light needs room to spread) | Warm, enveloping, peaceful |
Key Takeaways: Psychological Impact of Lighting in Practice
Emotional lighting is not about gear hype. It's about process.
You don't need twelve lights or a $10,000 kit. You need:
- A clear emotional intent for each shoot (approachable, authoritative, dramatic, calm).
- Measurable lighting properties tied to that emotion (ratio, color, distance, power).
- A portable, modular recipe that works in real, small spaces and stays within power budgets.
- Documented numbers so you can recreate the look anywhere without guesswork.
The psychology of portrait lighting works because light genuinely affects how viewers feel about the face they see. Hard science backs this: red light shifts mood; brightness intensifies emotion; soft light conveys trust; high contrast conveys authority.[1][2][3][4] Your job is to choose the emotional outcome first, then engineer the light to deliver it.
When you're tight on space, power, or budget, which is nearly always in real-world freelance work, these constraints become your secret weapon. You can't hide behind gear excess. You have to think. And thinking leads to consistency, client trust, and a recognizable visual signature that scales across any location.
Start with one setup that matches your brand emotional tone. Document it. Reproduce it five times in five different rooms. When it works every time, you've stopped gambling and started being a professional. That's when portability multiplies reliability, and every watt earns its keep.
Related Articles